
Is it easier to install PU insulated metal carved wall boards?
Installing PU insulated metal carved wall board can be a relatively straightforward process with the right preparation and tools. These boards are designed to provide insulation and aesthetic appeal, making them popular choices for both residential and commercial applications. Here’s a step-by-step guide on how to install PU insulated metal carved wall boards.
PU Insulated metal carved wall board installation procedures:
Prepare the work area: Start by clearing the area where you will install the wall boards. Remove any existing wall coverings or debris, and ensure the surface is clean, dry, and level.
Measure and cut the boards: Take precise measurements of the wall and mark them on the back of the PU insulated metal carved wall board. Use a circular saw or a jigsaw with a metal-cutting blade to cut the boards to the required dimensions.
Installing Starter: Installing the Starter to the bottom of walls to prepare the installation of boards.
Apply the adhesive (not necessary procedure): Apply a high-quality construction adhesive to the back of the boards. Make sure to follow the manufacturer’s instructions regarding the type and amount of adhesive to use. Apply the adhesive evenly across the entire surface of the board.
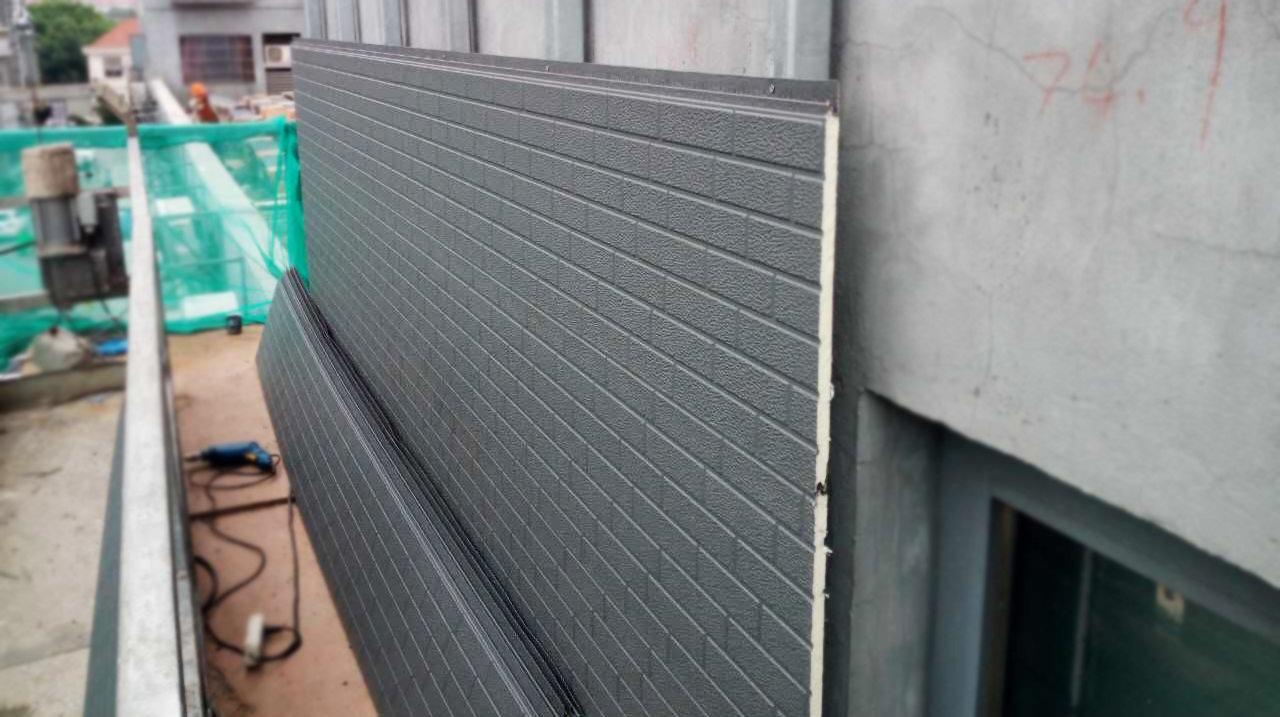
Position the boards: Carefully position the boards onto the wall, starting from one corner. Press firmly to ensure a strong bond between the adhesive and the wall. Use a level to ensure the boards are straight and plumb as you progress with the installation.
Secure the boards: To provide additional stability, use screws or nails to secure the boards to the wall. Place the fasteners near the edges of the boards, ensuring they penetrate the wall studs or other suitable structural supports. Space the fasteners according to the manufacturer’s recommendations.
Seal the joints: Use a sealant or caulk to seal the joints between the boards. This helps to prevent air leakage and provides a finished look. Smooth the sealant with a caulking tool for a neat appearance.
Finishing touches: Once the boards are securely installed, you can add any desired finishing touches. This may include painting the boards or adding trim around the edges for a polished look.
Clean up: Clean up any excess adhesive, sealant, or debris from the installation process. Dispose of materials appropriately.
Refer to Instruction about PU Metal carved boards installation
It’s important to note that the specific installation process may vary depending on the manufacturer and the design of the PU insulated metal carved wall boards. Always refer to the manufacturer’s instructions for the most accurate and up-to-date installation guidelines.
Overall, with careful planning, proper tools, and attention to detail, installing PU insulated metal carved wall boards can be a manageable task for individuals with basic DIY skills. However, if you are unsure or uncomfortable with the installation process, it’s recommended to consult a professional to ensure a successful and efficient installation.
